Toolbars are contextual inspector shortcuts that allow you to view and edit a game object, component or asset without having to keep the inspector window open. This saves you screen real estate that can be used for other windows. It also enables you to do most common operations from within a fullscreen scene view.
Toolbars
Updated: 2019-07-22
Game Object Toolbars
Game Object toolbars contain tools to let you:
- Inspect the Game Object (name, static flags, prefab overrides, etc.)
- Inspect each Component attached to the Game Object
- Inspect each Material assigned to any attached Renderer
- Add new components to the Game Object
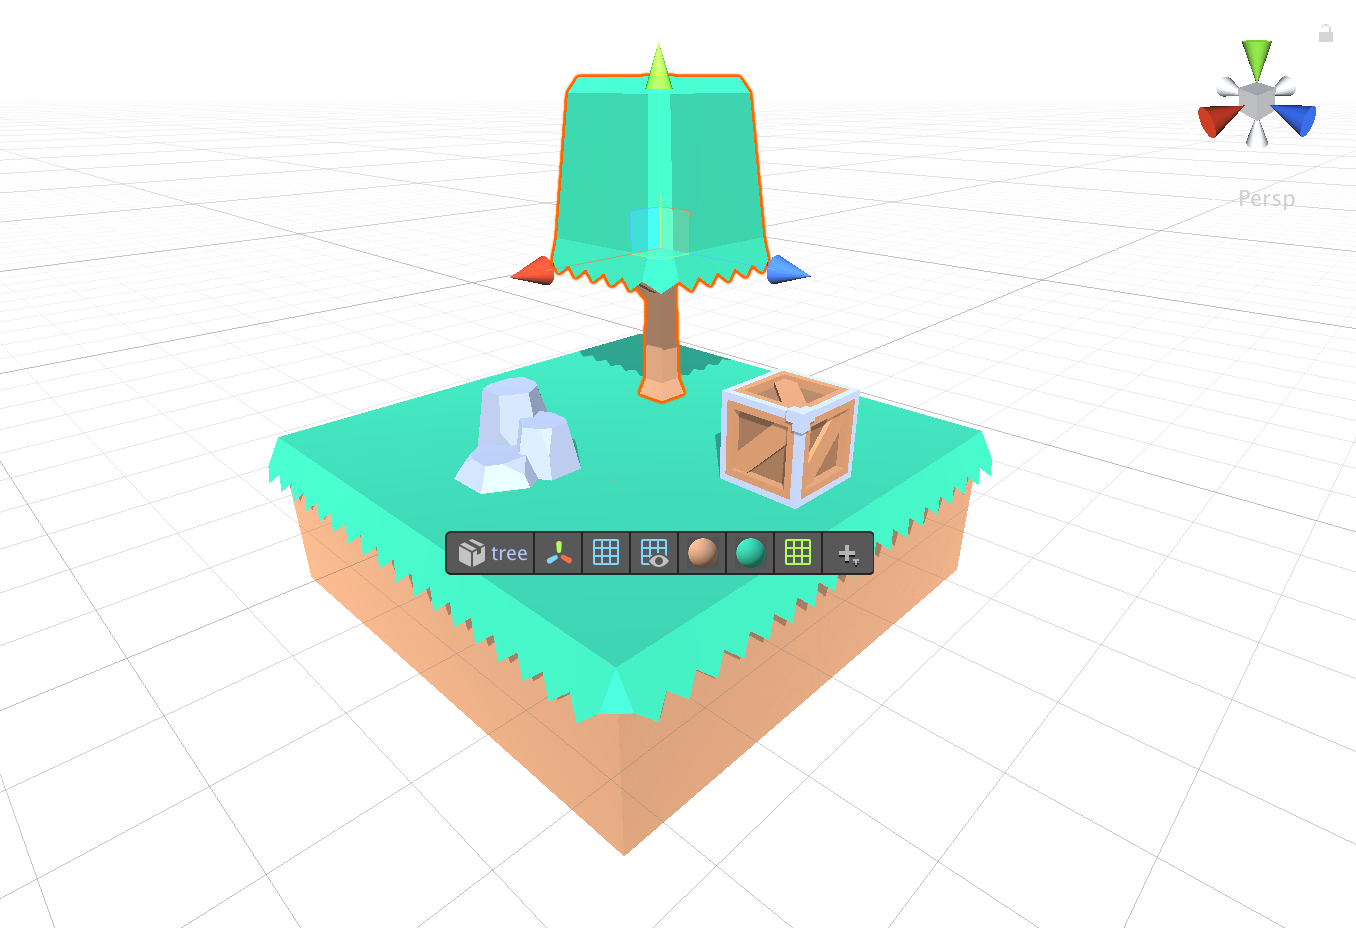
Scene Toolbars
In the Scene, toolbars appear below the selected game object. The first Game Object tool shows the name of the selection. The Component tools are shown as their respective component's icon. Finally, the plus symbol represents the Add Component tool.
Shortcut: Hold Alt+[0-9] while the scene toolbar is visible to quickly toggle any of its tools.
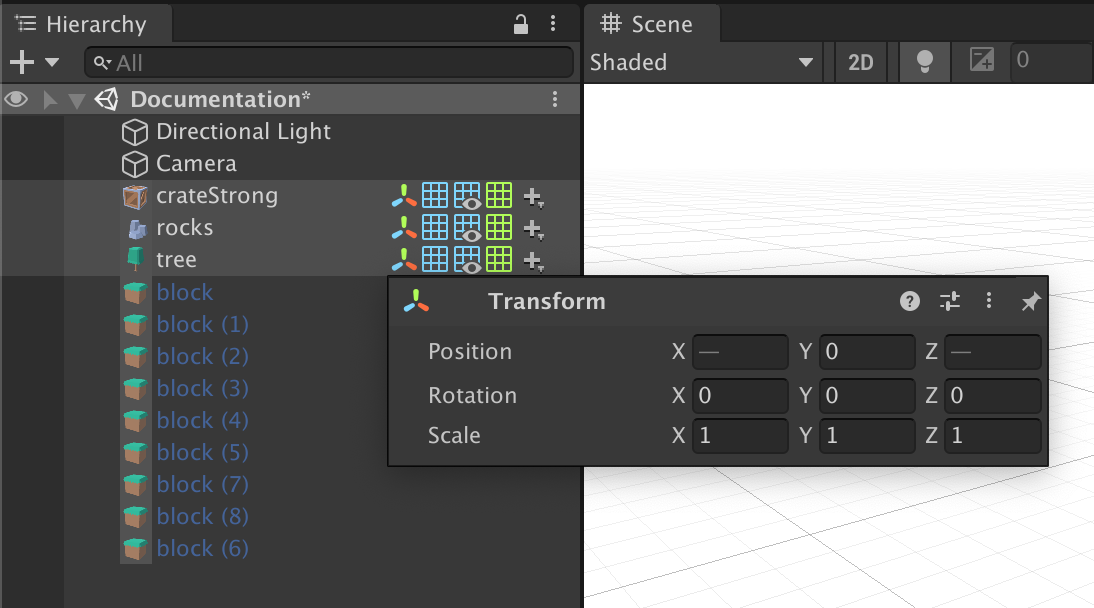
Hierarchy Toolbars
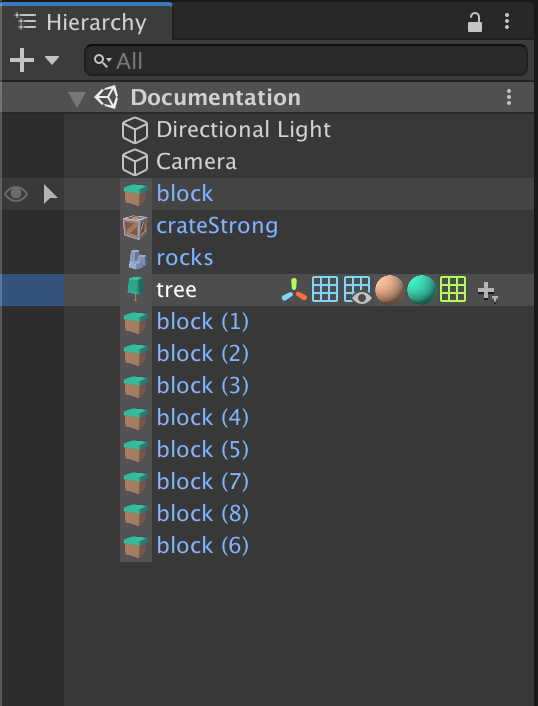
In the Hierarchy, toolbars appear on the right of the game objects that are selected or hovered. The Game Object tool itself is accessible from the icon on the left of the name. When the hierarchy window gets too small to show all the tools, a menu icon is shown to let you choose among the remaining tools.
Tip: You can change the alignment of the tools in the preferences to have them stick to the name on the left instead of the right side of the hierarchy.
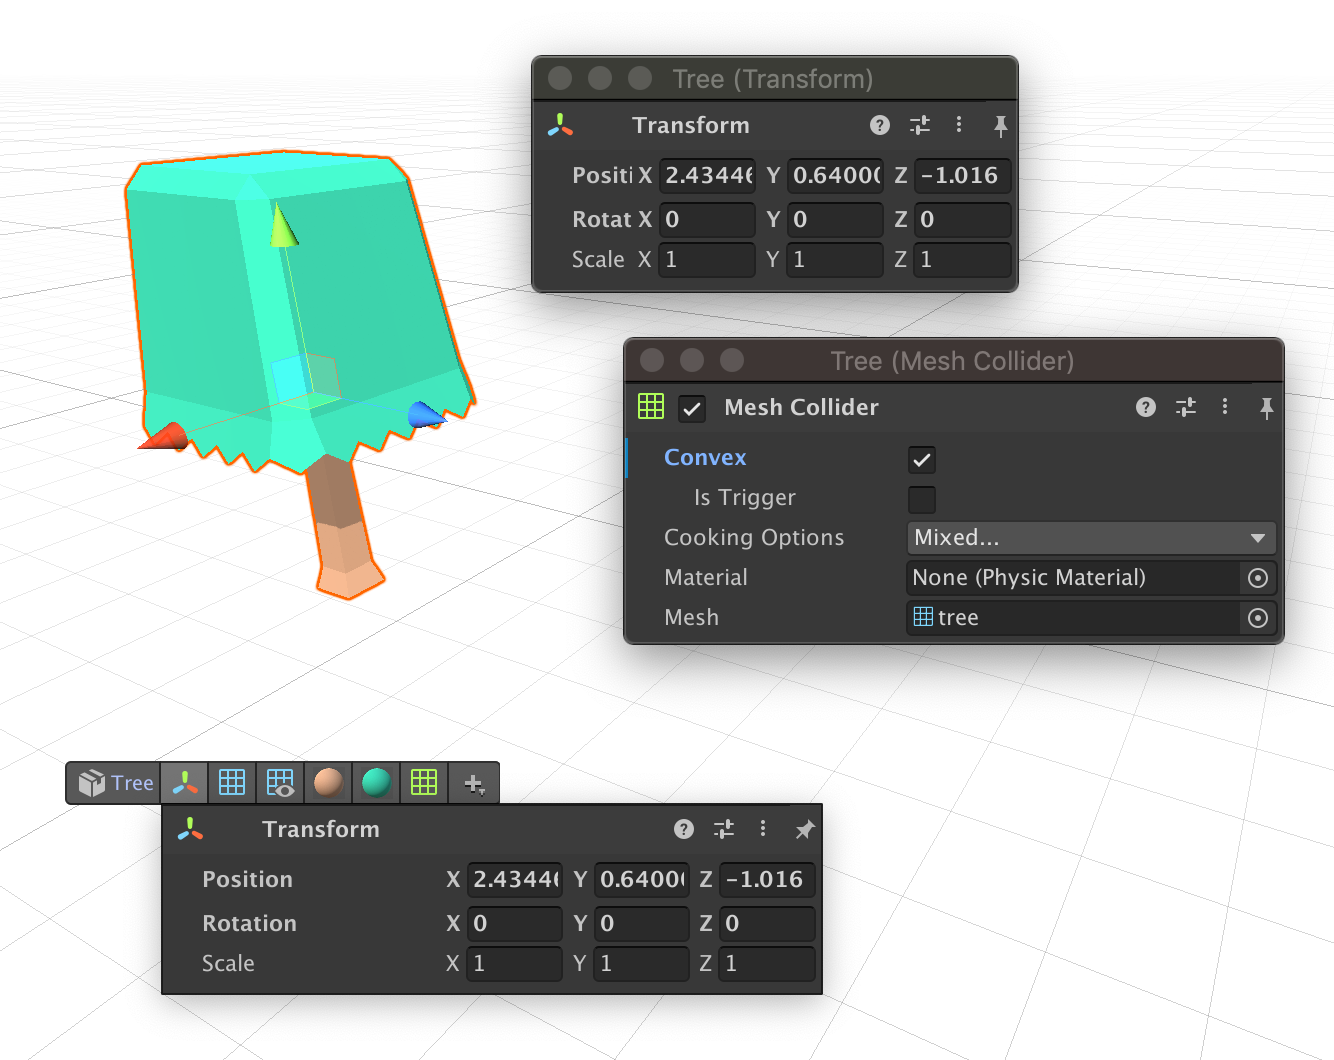
Inspector Popup
Left-click on a component or game object tool to bring up its inspector popup. These windows work exactly like the usual Unity inspector, with a few additions.

Click on the pin icon in the top right corner to pin the window. This is similar to the lock icon in the traditional Unity inspector. Once pinned, an editor will no longer follow the current selection, so pinning is a useful way to assign references across your scene. Each pinned window is completely independent, which allows you to drag and resize it as you like. You can pin as many inspectors as you like at once.
Shortcut: You can also hit the Space bar to pin the current inspector popup.
New in Peek v.1.3.0: You can now make your pinned inspectors persistent across assembly reloads (like entering play mode or reloading scripts) by enabling the Persistent Pins option in the Peek Preferences. Note that this option is currently experimental. Please report any bug on the forum!
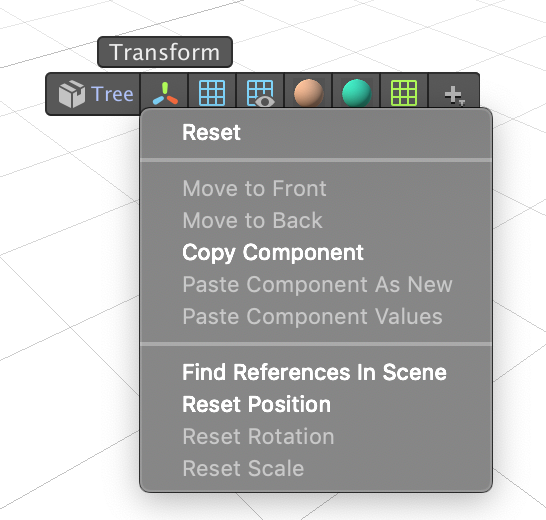
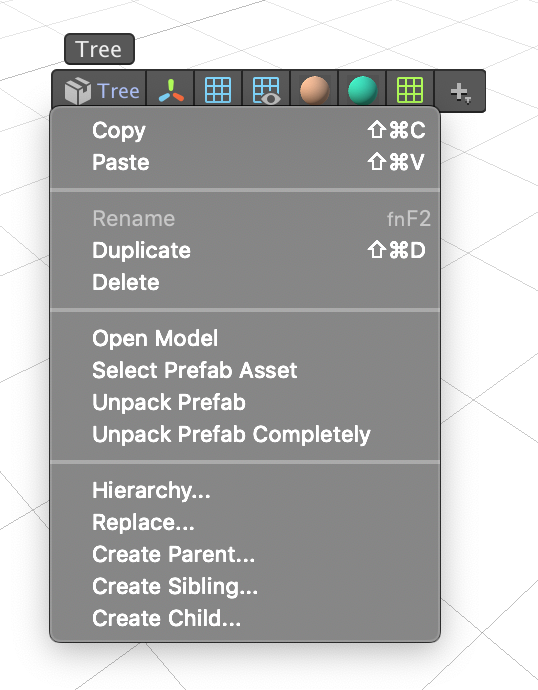
Context Menu
Right-click on a component or game object tool to bring up its context menu.
For components, the context menu let you quickly copy/paste values, reorder components, apply or revert prefab overrides and more.
For game objects, the context menu lets you quickly copy/paste/duplicate/delete, apply or revert prefab overrides or open prefabs for editing. It also lets you use Peek-specific features, like replacing the game object, showing the hierarchy popup or creating parent/sibling/child objects through the creator menu.
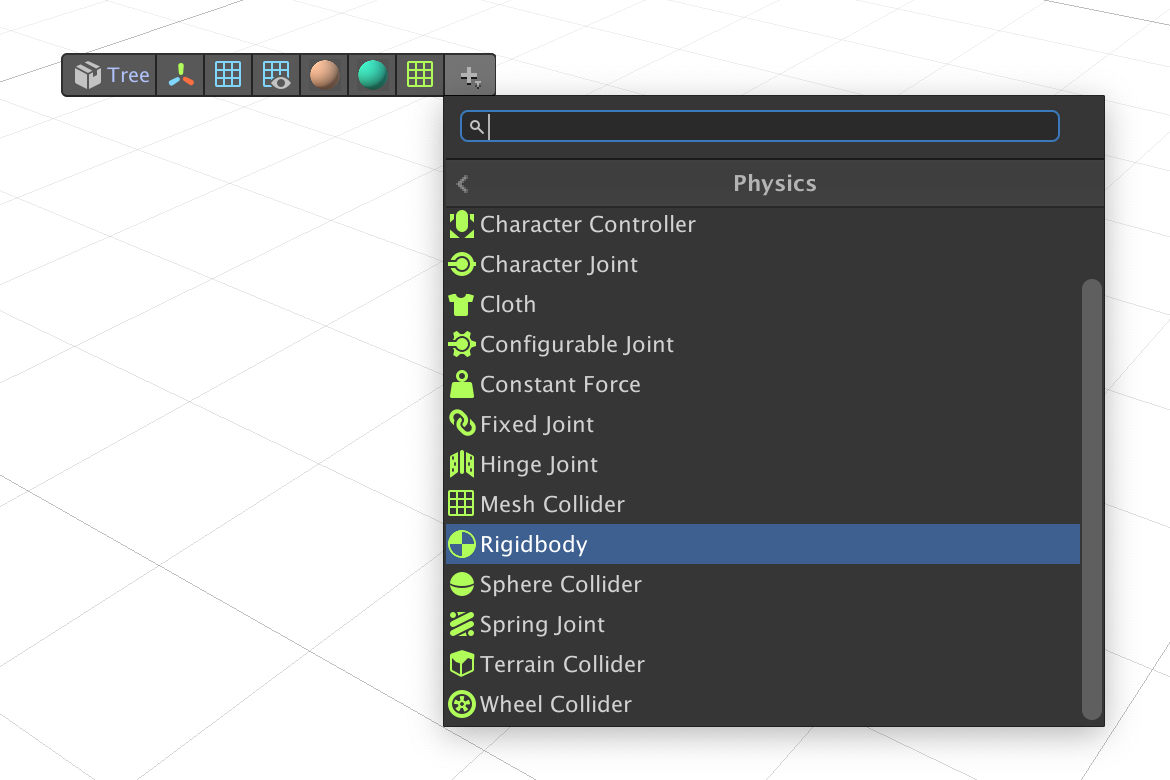
Add Component
Click the plus symbol at the end of the toolbar to bring up the Add Component menu for the current game object.
Multiple Selection
When multiple game objects are selected at once, the toolbars will only show the components and material that are shared by all game objects. Any edit made to those component will be applied to every object in the selection at once. Likewise, using the Add Component tool will add a new component to each game object in the selection.

Custom Scripts
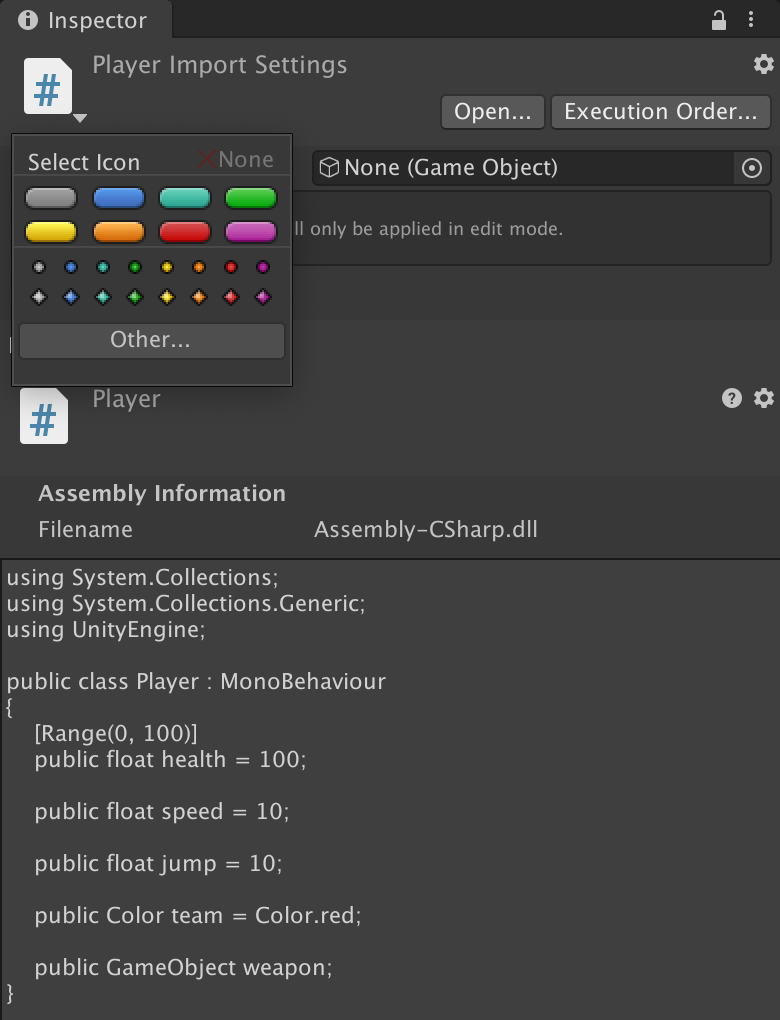
By default, custom scripts (components derived from MonoBehaviour) will be merged as a single icon in the game object toolbars. Clicking this merged script icon opens a menu to let you choose which script you want to inspect.
If you want to prevent your script from merging, you can give it a custom icon from the script import settings. Peek will notice the icon and display the tool separately.
Tip: You can change script merge behaviour in the preferences. By default, scripts without icons are merged, but you can also set it to always or never merge scripts.
Peek is compatible with all third-party custom editors and drawers, including those created with Odin Inspector.
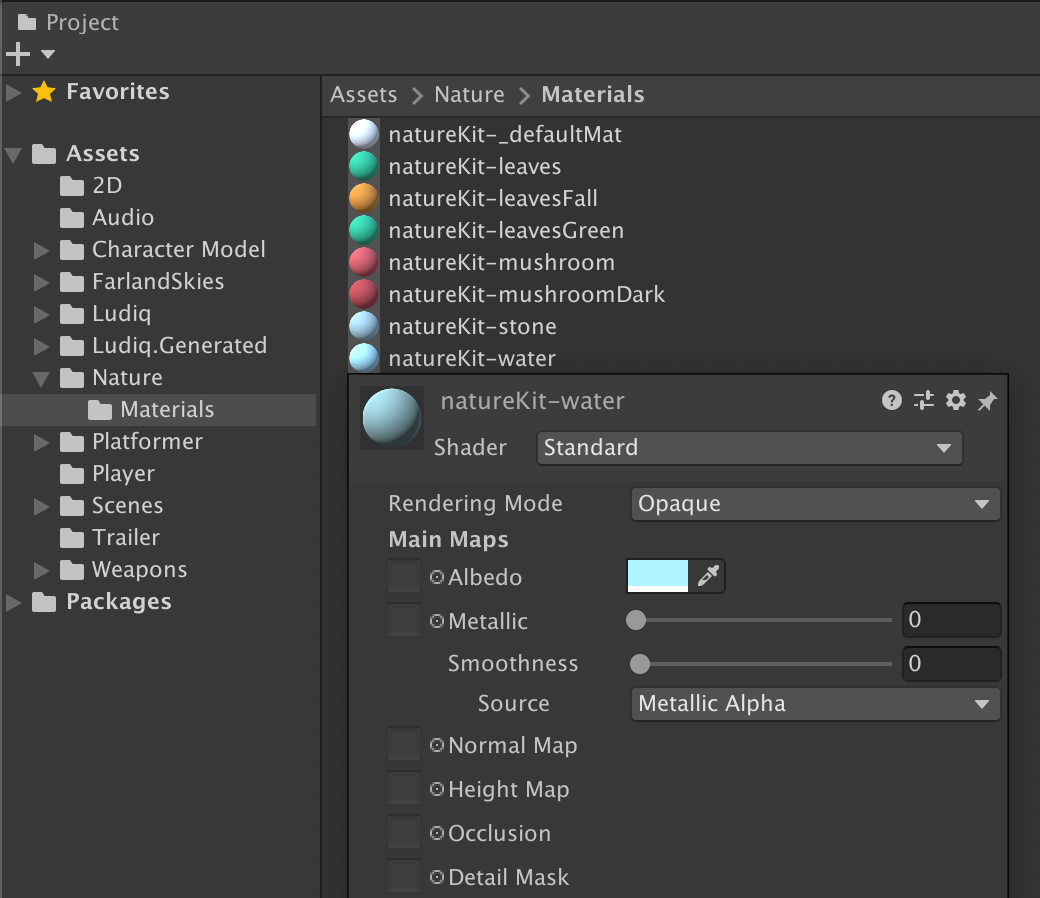
Project Inspectors
In the Project window, assets can be inspected by clicking their icon on the left of the name. This lets you quickly edit materials or import settings, for example.
Due to how the new prefab workflow works behind the scenes, Peek cannot edit components directly on the prefab assets. You will need to open the prefab to do so.
Was this article helpful?
Be the first to vote!