Weren't you amazed the first time you saw Neo stop bullets in the Matrix? Or when you saw the Wizard's slow time bubble in Diablo III? All of this (and more) is possible with Chronos' Area Clock component.
Adding an area clock
Updated: 2018-09-06
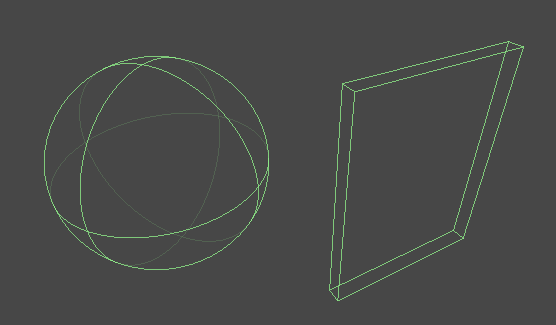
Area clocks are clocks that affect only the objects that enter their collider. They can take any (convex) shape and size, in 2D or 3D, and apply a time scale within. For example, stopping bullets could be implemented by a high, wide and thin cubic area clock with a time scale of 0. The slow time bubble could be created with a spherical area clock with a low time scale (probably around 0.25).
Because bullets have speeds that are too high for Unity's physics engine, they will not be stopped automatically by a thin area clock — they'll go right through the collider! Raycasting must be used for such scenarios.
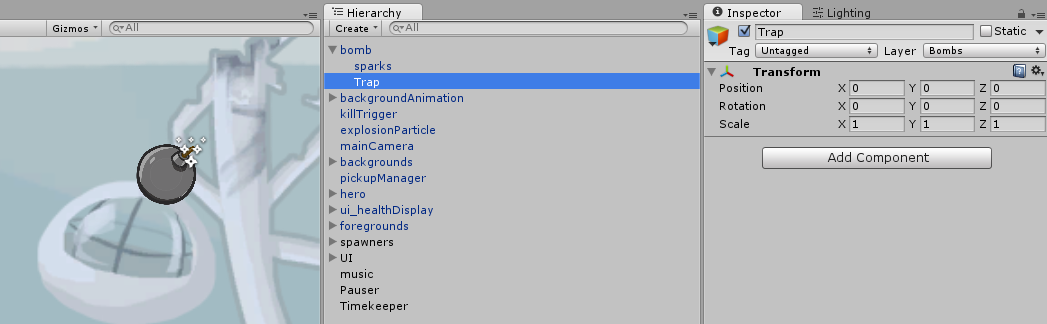
What we will create in our platformer is a "trap" around the bombs we throw. Whenever an enemy gets near the bomb's "force field", it will be immobilized so that it cannot escape before the bomb explodes. For that purpose, we'll need to use 3 components: a circle collider, an area clock, and a sprite renderer to visually display the force field.
First, place the Prefabs/Props/bomb prefab anywhere in your scene view. Then, add an empty GameObject child to it, called Trap, which will contain our trap components.
Let's then add our 3 components.
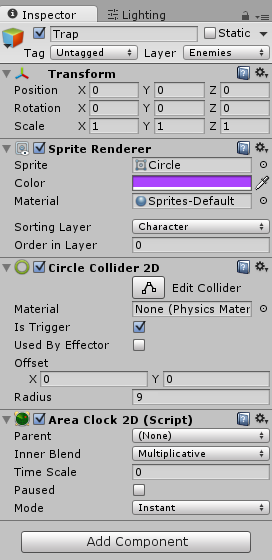
First, the renderer from Rendering > Sprite Renderer. Choose the Sprites/_FX/Circle sprite, and give it a translucent color that you like. Set its sorting layer to Character so that it renders above the background.
Second, the collider from Physics 2D > Circle Collider 2D. Toggle the Is Trigger checkbox and give it a radius of 9 so that it matches the size of the rendered circle.
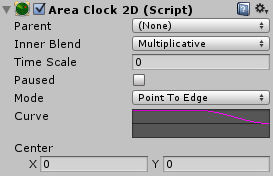
Third, the area clock from Time > Area Clock 2D. You can either set its time scale to 0 or toggle the Paused checkbox — both will have the same effect. For now, leave the mode at Instant.
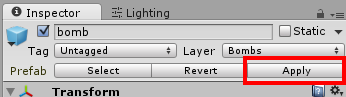
Select the bomb instance in the scene again and click Apply from the prefab toolbox on top of the inspector to save your changes.

Try playing your game now. You'll notice the trap doesn't work! That's because we haven't set up our collisions properly.
Area clocks use Unity's built-in collisions to work. That means:
- The area clock needs a trigger collider for
OnTriggerEnterandOnTriggerExit - The object that enters the area clock must have a rigidbody for the collisions to be registered;
- The layer of the area clock is used to select what objects it affects.
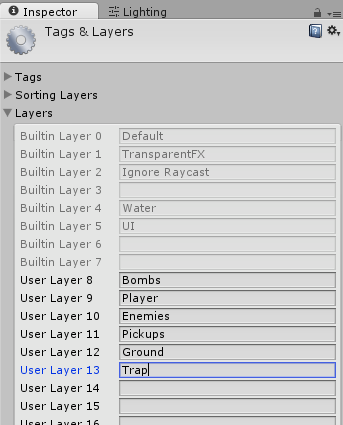
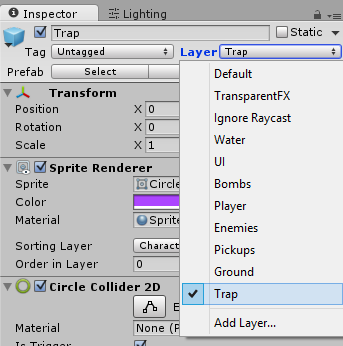
We're good for conditions 1 and 2, but not for 3. First, create a new layer called "Trap" and apply it to our trap object. Then, open up Edit > Project Settings > Physics 2D and configure the collision matrix so the Trap layer only collides with the Enemies layer. These steps are illustrated below:
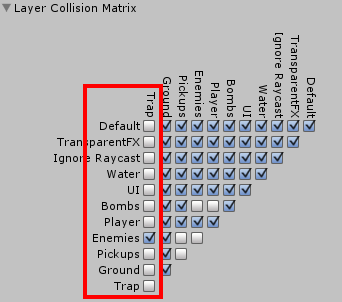
Make sure you're not editing the 3D Physics settings! They're located in a similar but different menu: Edit > Project Settings > Physics.
Try playing the game now. The traps now sort of work — they stop the enemies, that is — but they stay stuck at the very edge of the trap, which doesn't look very realistic. Let's fix that.
Tired of waiting to get bombs? Change the Bomb Count value under the Lay Bombs component of the hero object in the scene. It's not cheating if we're just testing the game... right?
This unwanted behaviour happens because we left our area clock's mode at Instant, meaning that as soon as a collision is registered between a clock and the enemy, the clock's time scale, zero, is applied. This is rarely good for real-world scenarios, as it looks rough and unrealistic. Let's change our clock's mode to Point to Edge to change that.
This brings up a curve in the inspector that allows us to specify how the time scale will progress along the area clock.
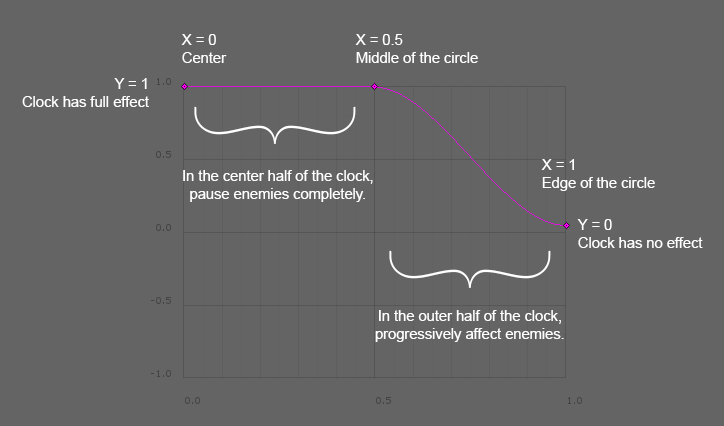
The Y axis is a multiplier of the effect of the clock. For example, Y = 1 means our enemies will be completely stopped, while Y = 0 means that they'd move at normal speed. For clocks that have a non-zero time scale, you can even set Y < 0 to reverse the time scale.
The X axis is an indication of progress within the clock. For the Point to Edge mode, X = 0 is the center of the clock, and X = 1 is the edge.
The Center parameter allows you to offset what point in the clock is considered to be the center for the curve at X = 0. Since we have a circle clock, it makes sense to leave it at (0, 0), the center of the circle. If you change that parameter, you should see the area clock gizmo move in the scene view as a visual helper.
We want to make the enemies that enter our trap progressively affected by its pause. In other words, we want our curve at X = 0 to have full effect (Y = 1), and slowly dampen this effect from the middle of the clock (X = 0.5) to its edge (X = 1) until it reaches Y = 0. The picture below explains the curve we apply:
We could have obtained the same effect by using the Distance from Entry mode, with slightly different settings. See the API Reference about area clock modes and curves to learn more.
Now, apply your prefab changes and try playing your game. Enemies are properly affected by the trap — our bombs just became much more deadly!
Was this article helpful?
Be the first to vote!